.png?width=150&height=26&name=indyauction%20Logo%20(Black).png)
1. Select the template:
- Log in to your seller dashboard and navigate to the auction creation page. Select "Create new auction" and choose from either the Timed or Live auction type.
Pro tip: Most online auctions use the Timed auction type, but if you're not sure on which auction type to choose, use this guide.
- Select "Standalone auction template" and "Continue with this template".
- You will see the Auction Creator page load with the Standalone template layout active.
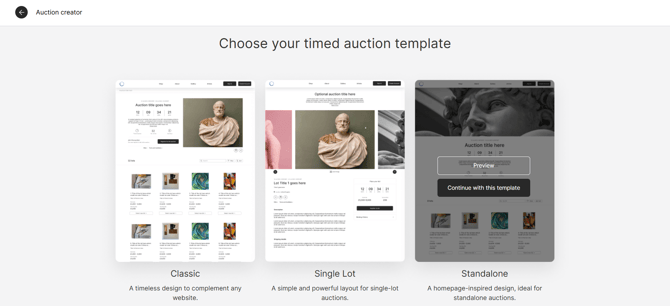 Auction template selection page
2. Customise your brand elements:
-
Upload your organisation's logo, set primary and secondary brand colours, and make sure to add your lead auction image.
-
Ensure all your auction details are filled in on the right hand menus. As you fill in each field, you will see a live preview on the left side update with your auction information and customisation.
Pro tip: Use our auction customisation guide for more help on customising your auction.
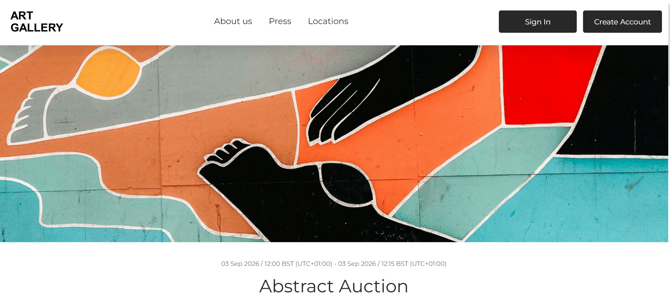 Example of a customised Standalone auction with a lead auction image banner
3. Add lot details and media:
- After you've saved your auction customisation, you'll be taken back to the auction dashboard. From there, select Lots and then Create lots.
- Begin uploading your lots, use our guide on uploading auction lots to ensure you enter all the lot details.
- You will see the lot information and images appear in the preview window as you upload them. Make sure to save after you upload each lot.
4. Publish your auction:
-
Use our guide on going live with your auction as a checklist to review your auction details before you publish.
- After reviewing all details, select Publish auction. You can now share your auction across your communications channels.
- Your auction status will now be Published in your dashboard.